

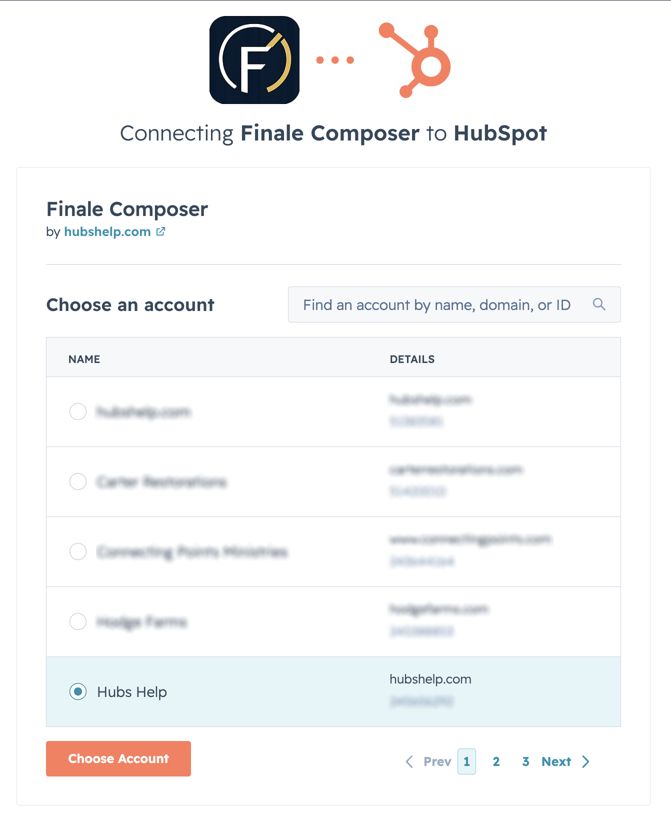
Step 1
Install App
- From the install screen seen here, select your HubSpot portal where you want to install the app.
- The app and associated module will function on any page, any site within the selected portal.
- Each portal where the app is installed will need its own subscription.
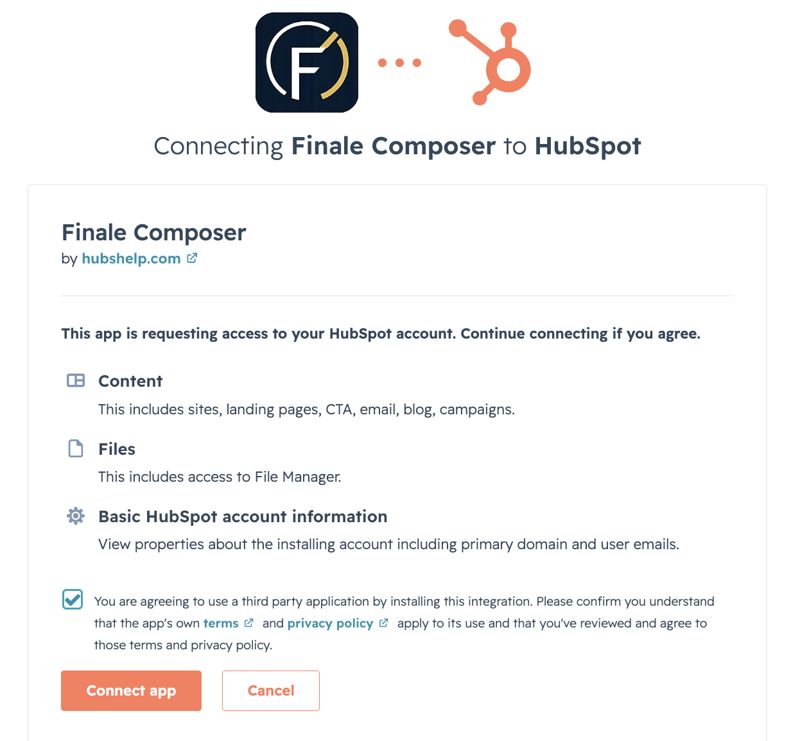
Step 2
Connect App
This step shows the scopes that are required by this app.
- Content - required access to your website content pages, theme styles, and design manager.
- Files - needed for the ability to upload attached files or to select from existing ones in File Manager.
- Basic Account Information - every OAuth-connected app requires this as it gives access to: portal ID, domain, and meta token.
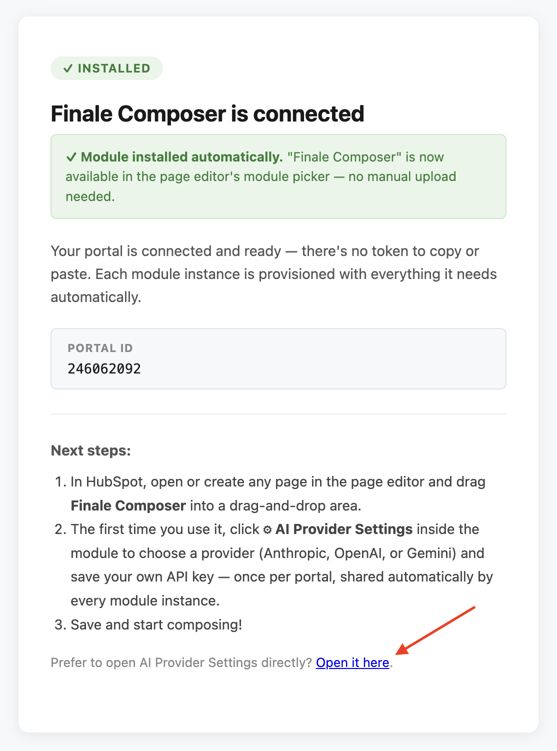
Step 3
Connected Confirmation
App is installed and connected!
You should see the green box confirming that the "Module installed automatically". This means the Finale Composer MODULE is now added to your design manager and available to add to a content page.
Next steps: Connect to your AI Provider. Click the link at the bottom of the screen "Open it here". You can also copy this link from the module itself when you add it to a page.
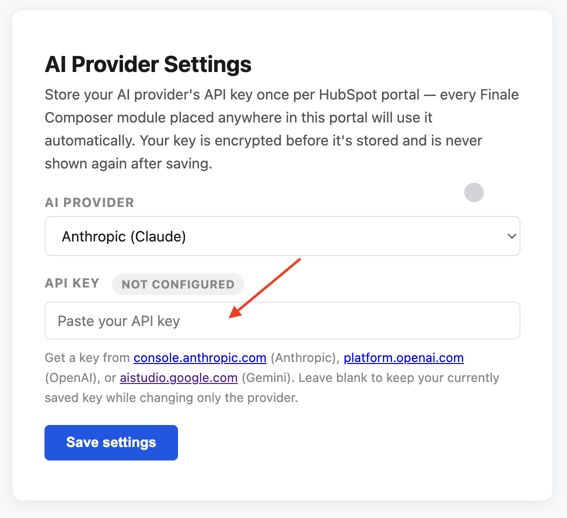
Step 4
Connect AI Provider
The AI functionality of this app and module are reliant on you having an account to connect to. As of now, you can connect Composer to Claude, ChatGPT, Gemini, or Grok.
- Select the provider that you are using.
- Paste in your API key from that provider. If you do not have one yet or know it, you can click on the appropriate link to go to your account and generate that API key.
- Click "Save Settings".
Step 5
AI Provider Connected
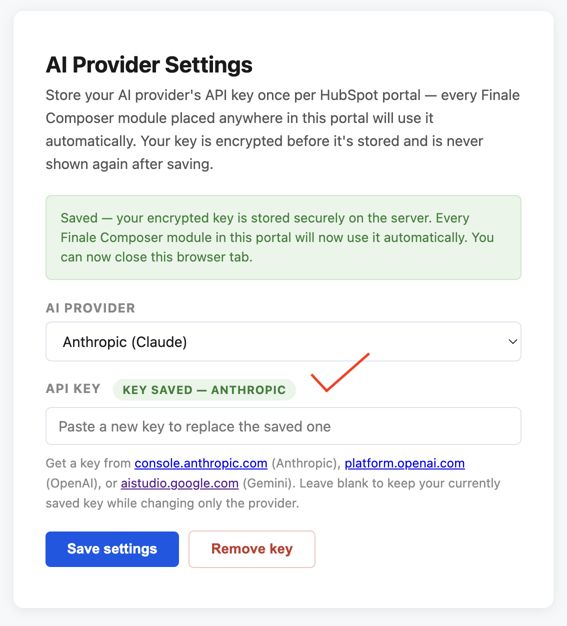
You should now see a green box saying "Saved" and confirming that your AI Provider API key has been successfully saved.
From this screen, you can also remove a key if needed, or switch AI providers.
NOTE: Your API key is stored AES-256 encrypted; never logged or transmitted to any party other than the chosen provider.
Step 6
Add Module to Page
Create or open an existing web or landing page. Time to get to work!
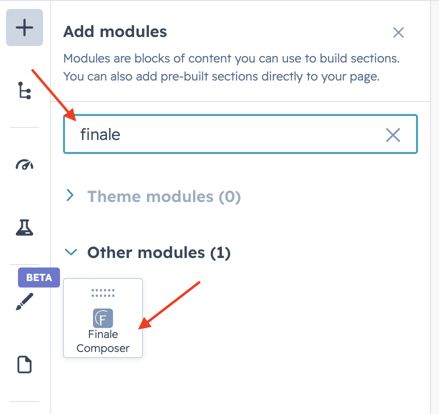
- Click the + on the left toolbar to add a module.
- The Finale Composer module is not part of your theme, so you will not see it in the "Theme modules" displayed by default. Search for "Finale" and you'll see it under "Other modules."
- Drag the module on to your page wherever you want to use it, just like you would any other module.
Step 7
Get a Subscription
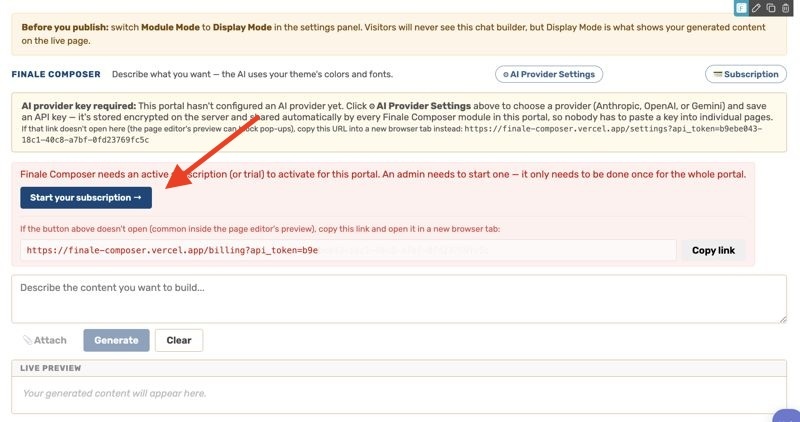
You can't use the tool without an active Composer subscription.
Click the button to setup your Subscription. This will open a new tab and you will see the various options to setup and activate your account.
Step 8
Choose Subscription Plan
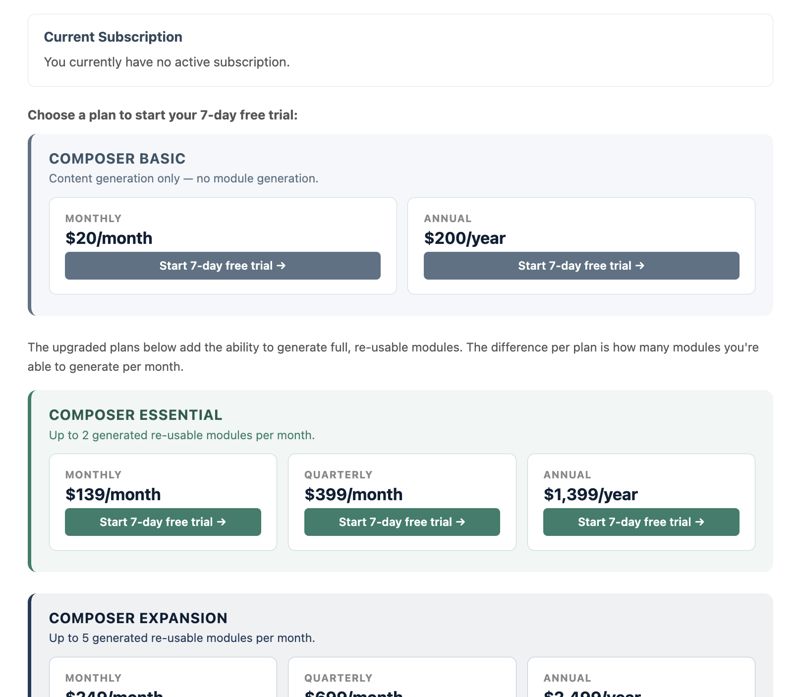
Choose your desired plan, payment frequency, and then enter payment details. This will start your 7-day FREE trial! No charge will occur until the trial period ends, or if you cancel prior to the trial end.
You have the Base subscription for the core app and module, but you can upgrade for the ability to generate re-usable modules.
Also, use the link in the module to return to this page any time to see your current subscription status, make billing changes, or cancel.
Step 9
Get To Work
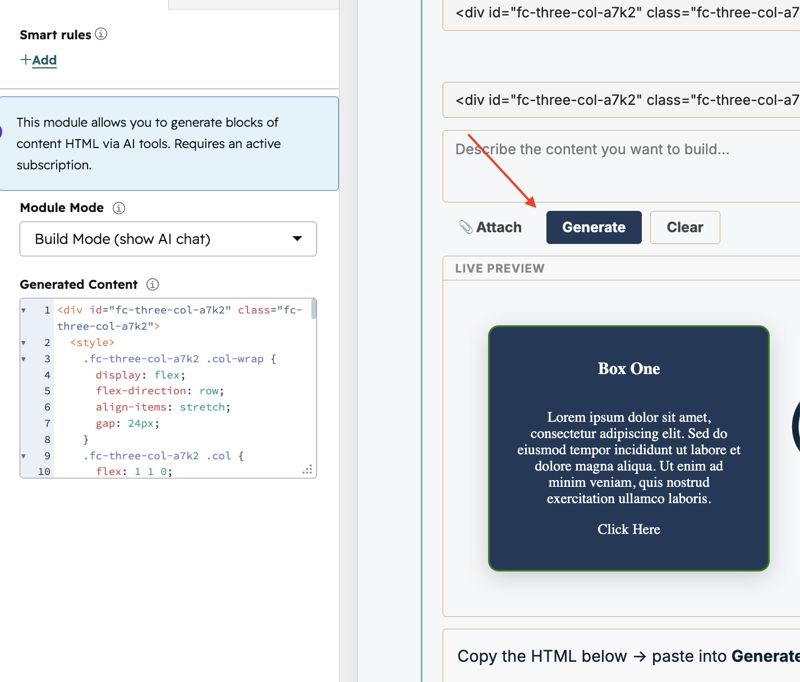
Return to the page editor and refresh your page to see your now active module!
Then start the conversation with your AI Provider... enter the details of what you want your module layout and content to be... then click "Generate"!
You'll see a preview of what you created. Continue the conversation to edit as needed.
Step 10
Implement Code
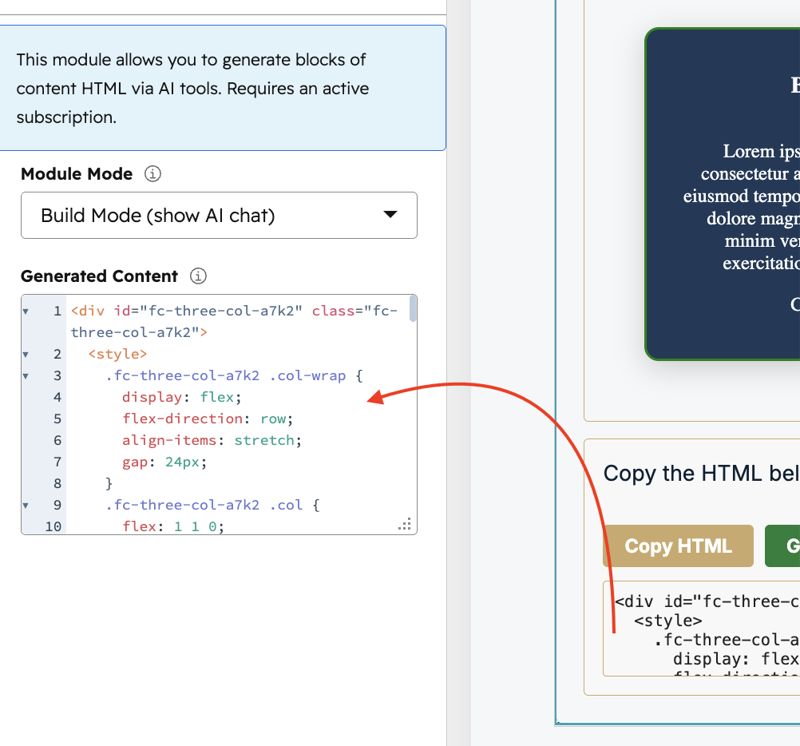
When you are ready:
- Click the "Copy HTML" button below your preview.
- Move to the left panel and paste your HTML into the "Generated Content" box.
- Click "Apply Changes".
Now your generated content will be visible on a preview or live page!
Step 11
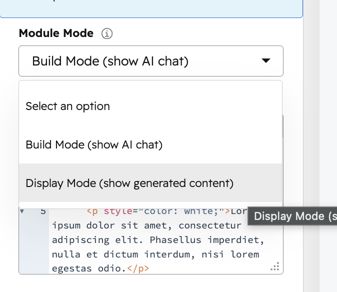
Enable Display Mode
When finished editing, change "Module Mode" to the "Display Mode" option. This will update the editor panel to show the generated content instead of the full AI tool.
If you need to edit further, you can always switch back to "Build Mode"!
Step 12
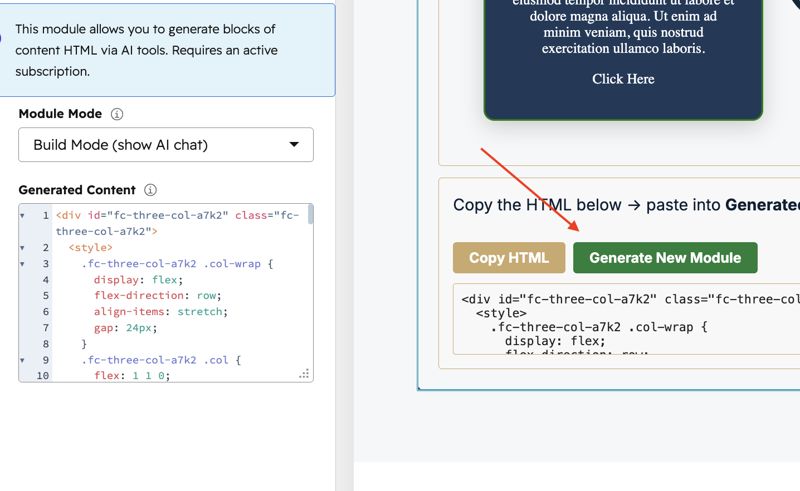
Generate Re-Usable Modules
NOTE: For Essential and higher subscriptions only!
Beyond generating the content for display, you can actually create a complete, re-usable module from what you have built... complete with appropriate fields and style fields.
The app will attempt to generate needed fields, but keep this in mind as you give your conversation prompts. If there are particular fields, style fields, and defaults you want, give those details in your prompt.
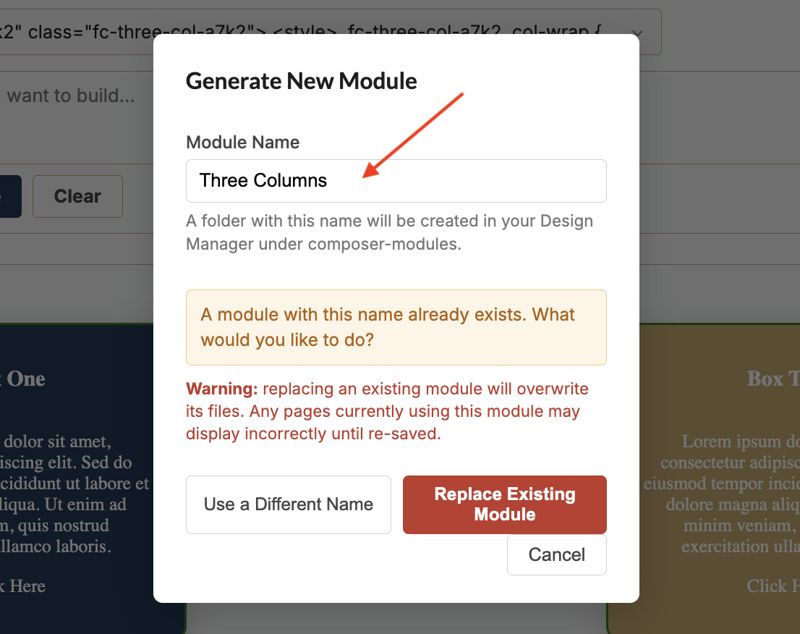
Step 13
Name Your New Module
Enter your desired name for your module. It will be created in the "composer-modules" folder in your Design Manager. If you want to update an existing module, use the same name. You will get a prompt like you see here. So you can either update an existing module or create a new one!
The name you give is what will display in the page editor view. The files themselves will be converted into an all lowercase version with no spaces. So "Three Columns", for example, would be converted to "three-columns".